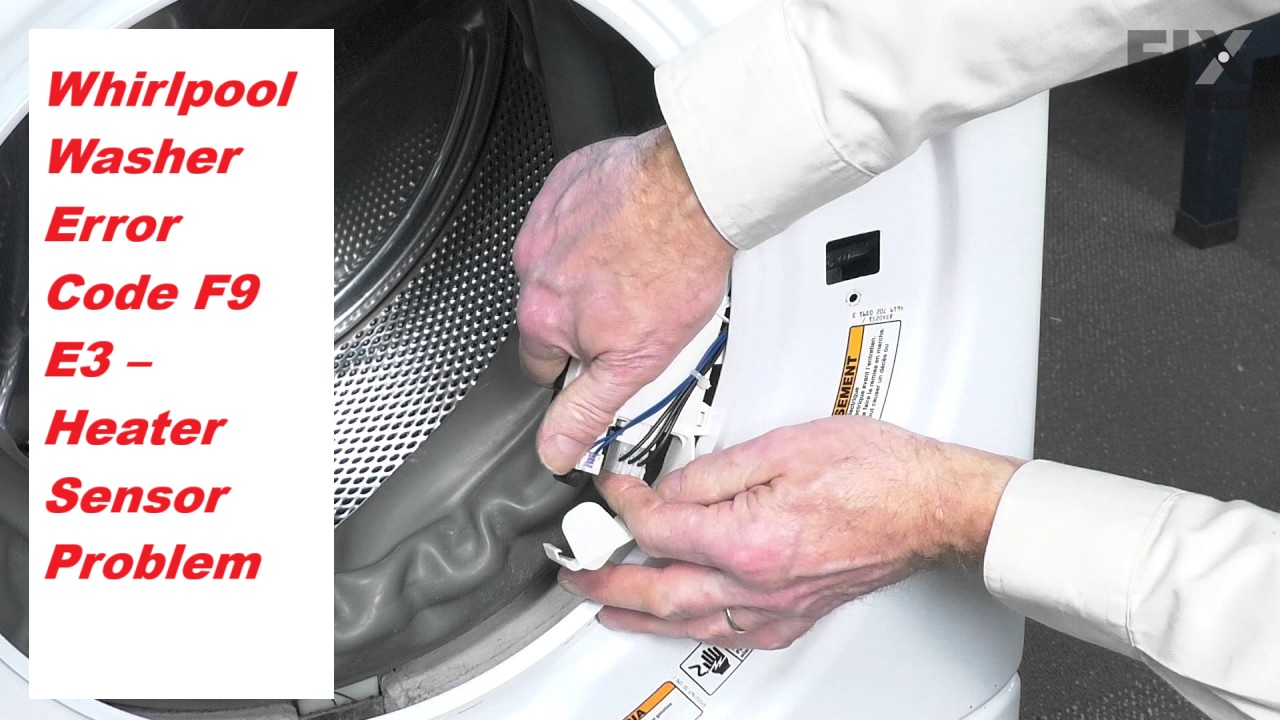
Dealing with the Whirlpool washer error code F9 E3 can be incredibly frustrating, but you’re not alone. This particular code indicates that there is a problem with the heater sensor, which is responsible for ensuring your washer can reach the correct wash temperature.
Don’t worry; this is a common issue, and many of the causes are easier to fix than you might think.
One common cause of the F9 E3 error is faulty wiring, which can disrupt the connection to the heater sensor.
To fully understand this error and explore other potential causes and effective DIY solutions, I encourage you to read through the entire post.
You’ll find valuable information that can help you get your washer back in working order!
What Does the Error Code Mean?
Have you ever run into the Whirlpool washer error code F9 E3? This code is an indication that there is a malfunction with the heater sensor. When your washer displays this error, it’s signaling that the heater is not working correctly, which can prevent the machine from reaching the necessary temperatures for effective washing.
This issue can also originate from wiring problems, which may interfere with the communication between the control board and the heater sensor. To tackle this issue, you should start by examining the heater sensor for any visible signs of damage or wear. Look for any cracks, corrosion, or loose connections that may indicate a problem.
Next, check the wiring. Inspect the wires for any fraying, breaks, or loose connections that could disrupt the signal from the control board to the heater sensor. Identifying and addressing these issues promptly can help restore your washer’s performance and prevent further complications down the line.
If you’re not comfortable with diagnosing or repairing these components yourself, it’s always a good idea to consult a professional technician. Safety is paramount, and a trained expert can ensure everything is handled correctly. Remember, taking the time to address these issues not only improves your washer’s efficiency but can also extend its lifespan.
Common Causes of the Error Code
Understanding the F9 E3 Error Code in Whirlpool Washers
Cause 1
One common cause of the Whirlpool washer error code F9 E3 is a malfunctioning door lock assembly. When the door lock fails to engage properly, it can lead to a sensor malfunction, which in turn prevents the heater from operating correctly. This issue is often due to faulty wiring or connections within the lock assembly.
To troubleshoot this problem, start by inspecting the wiring for any signs of damage. Look for fraying, disconnections, or any other visible issues that could disrupt communication between the door lock and the control board. It’s crucial to ensure that the door lock assembly itself is functioning correctly. If either the sensor or the wiring is compromised, you will likely encounter the F9 E3 error code.
Addressing this issue may involve repairing or replacing the affected components to restore your washer’s proper operation. Always prioritize safety by disconnecting the appliance from power before conducting any inspections or repairs. If you’re unsure about any steps, don’t hesitate to consult a professional for assistance.
Cause 2
One of the common culprits behind the Whirlpool washer error code F9 E3 is a drainage issue, often caused by a clogged drain hose or pump. When water can’t drain properly, it can interfere with the operation of the heater sensor, resulting in this error code. Here are some specific drainage problems to investigate:
- Clogged Drain Hose: Begin by checking the drain hose for any blockages that could obstruct water flow. Clear any debris you find.
- Faulty Drain Pump: Test the functionality of the drain pump. If it’s not operating as it should, it may need to be replaced.
- Kinks in the Hose: Inspect the drain hose for any kinks or bends that could restrict water flow. Ensure it’s positioned correctly.
- Wiring Issues: Look at the wiring connected to the pump. Damaged wires can cause the pump to malfunction, so check for any visible signs of wear or damage.
Cause 3
While it’s crucial to tackle drainage issues, there are several other common causes for the Whirlpool washer error code F9 E3 that you should keep in mind. One notable culprit can be a malfunctioning heater sensor. This component plays a vital role in regulating the washing cycle, and if it’s not working properly, it can disrupt your entire laundry process. I recommend performing diagnostic testing to determine if the heater sensor is indeed the problem.
Another aspect to consider is the wiring within your washer. Damaged connections or shorts in the wiring can send erroneous signals to the control board, triggering the F9 E3 error code. During your testing, if you come across any damaged wires or connections, it’s important to plan for their replacement to ensure your washer operates smoothly again.
Before you begin any repairs or replacements, always make sure to disconnect the power to your washer. This simple step is crucial for your safety and helps prevent any accidents while you work on your appliance. By understanding these common causes, you’ll be better equipped to troubleshoot and resolve the F9 E3 error code effectively. Remember, taking the time to diagnose the issue accurately will save you time and effort in the long run.
Cause 4
If your Whirlpool washer is displaying the F9 E3 error code, it’s important to understand that a faulty control board could be at the root of the issue. This error typically signals a problem with either the sensor or the wiring connected to it. Let’s break down some common causes to consider:
- Faulty Heater Sensor: If the heater sensor is malfunctioning, it may provide incorrect readings to the control board, triggering the error code.
- Wiring Issues: Inspect the wiring for any signs of damage or looseness. Damaged or improperly connected wires can interrupt communication between the control board and the heater sensor.
- Control Board Failure: A malfunction within the control board itself can prevent it from processing the sensor data correctly, leading to the F9 E3 error.
- Connection Problems: Ensure that the connections at the sensor terminals are secure. Poor connections can also contribute to the error code appearing.
Required Tools to Fix the Error
Essential Tools for Troubleshooting F9 E3 Error Code
Basic Tools
When dealing with the Whirlpool washer error code F9 E3, it’s crucial to have the right tools at your disposal to ensure a smooth and successful repair. As someone with over 20 years of experience in appliance repair, I can assure you that being prepared will make your troubleshooting process much easier. Here’s a list of essential tools you should gather before you begin:
- Multimeter – This tool is indispensable for testing the heater sensor and other electrical components within your washer. It allows you to accurately measure voltage, resistance, and continuity, helping you diagnose issues effectively.
- Screwdriver Set – A good set of screwdrivers, including both Phillips and flathead types, will enable you to access internal parts of the washer without hassle. Make sure the handles are comfortable for prolonged use.
- Pliers – A sturdy pair of pliers is useful for gripping, twisting, or cutting wires as needed during the repair process. They can help you manage any connections or components that require extra leverage.
- Flashlight – A reliable flashlight is essential for illuminating dark areas inside the washer during your inspection. Good visibility is key to identifying problems that may not be immediately apparent.
Supplies
Gathering the right supplies is crucial for effectively addressing the Whirlpool washer error code F9 E3. Start by obtaining a replacement heater sensor, as this component is frequently the primary cause of the error. A multimeter is also essential for testing electrical components to ensure they are functioning properly.
For proper maintenance, it’s wise to have a comprehensive screwdriver set at your disposal. This will help you access the washer’s control panel and any other necessary parts without hassle. Additionally, keep a towel nearby to manage any spills that may occur during the repair process.
Having these supplies and tools ready will make troubleshooting more straightforward, enabling you to resolve the error efficiently and restore your washer’s functionality. Remember to always follow safety precautions when handling electrical components, as your safety is paramount during any repair work.
Pre-Safety Checklist Before Fixing
Before you start working on your Whirlpool washer that’s showing the F9 E3 error code, it’s crucial to prioritize your safety and ensure the appliance is ready for repairs. Following a safety checklist can help you avoid potential hazards and streamline the repair process. Here’s a pre-safety checklist to guide you:
- Unplug the washer: This step is vital to eliminate the risk of electric shock. Always disconnect power before performing any maintenance on electrical appliances.
- Inspect for water leaks: Check the area around the washer for any signs of leaks. A dry work environment is essential for both safety and effective repairs.
- Wear safety gear: Equip yourself with safety gloves and goggles. This protective gear will shield you from sharp edges and other hazards you may encounter during the repair.
- Consult the user manual: Familiarize yourself with the specific safety warnings and guidelines provided for your washer model. The user manual contains valuable information that can aid in your repair efforts.
Diagnose the Error Code
With the right safety precautions in place, you can confidently address the F9 E3 error code in your Whirlpool washer. To start, unplug the machine to ensure your safety while you work. Understanding the significance of error codes is crucial, and the F9 E3 typically points to a potential issue with the heater sensor.
Begin by inspecting the wiring and connections that lead to the sensor. Look for any loose or damaged wires, as these can often trigger this error code. If everything appears intact, use a multimeter to measure the sensor’s resistance. It’s important that this reading falls within the range specified by the manufacturer—check your user manual for the exact values. If your measurement falls outside of this range, it’s a strong indication that the sensor may need to be replaced.
As you go through this process, take careful notes of any irregularities you discover. Documenting your findings can be invaluable, especially if you decide to consult a professional technician later on. Remember, approaching these repairs with patience and attention to detail can save you time and money in the long run. If you have any questions or need further guidance, feel free to reach out—I’m here to help you through this!
Step-by-Step DIY Troubleshooting Guide
Transitioning to Troubleshooting Steps
Fix for Cause 1
If your Whirlpool washer is displaying the F9 E3 error code, it’s important to address this issue quickly to restore your appliance’s functionality. This error typically indicates a problem with the heater sensor, and I’m here to guide you through the troubleshooting process step by step.
- Unplug the Washer: Safety is your top priority. Start by disconnecting the washer from the power source. This will prevent any accidental electrical shocks while you work.
- Check the Wiring: Next, inspect the wiring connected to the heater sensor. Look for any signs of damage, such as frayed wires or corrosion. A reliable connection is crucial for the sensor to function correctly.
- Test the Heater Sensor: Now it’s time to test the heater sensor itself. You’ll need a multimeter for this step. Set the multimeter to the resistance (ohms) setting and measure the resistance of the heater sensor. Compare your reading to the specifications provided in your washer’s manual. If the resistance is outside the recommended range, the sensor is likely faulty.
- Replace the Heater Sensor: If you’ve determined that the sensor is indeed defective, you’ll need to replace it. Make sure to purchase a replacement sensor that matches the specifications of your model. Follow the manufacturer’s guidelines for installation, ensuring all connections are secure.
Fix for Cause 2
After addressing the heater sensor issue, let’s explore another common cause for the F9 E3 error code. It’s essential to ensure that the heater itself is functioning correctly.
First and foremost, safety is our priority. Start by unplugging the washer to eliminate any risk of electric shock. Next, you’ll want to locate the heater assembly, which is typically positioned at the bottom of the tub.
Using a multimeter, you can test the resistance of the heating element. A properly functioning heater should read between 10 to 50 ohms. If your readings fall outside this range, it indicates that the heater may be faulty and require replacement.
To proceed with the replacement, carefully disconnect the wires from the old heater, unscrew it from its mounting, and install the new unit in its place. After securing everything, reconnect the wires, plug the washer back in, and run a test cycle to see if the error code has been resolved.
Fix for Cause 3
While inspecting the heater and its connections is crucial, another common reason for the F9 E3 error code could be a malfunctioning door latch assembly. Let’s walk through a reliable, step-by-step approach to troubleshoot this issue safely and effectively:
- Safety First: Unplug the Washer – Before you begin any inspection or repairs, ensure the washer is unplugged from the power source. This step is vital to prevent any electrical hazards while you work on the appliance.
- Inspect the Door Latch – Take a close look at the door latch for any signs of damage or excessive wear. Ensure that it securely engages when the door is closed. A faulty latch can prevent the washer from operating correctly.
- Examine the Wiring Harness – Check the wiring harness connected to the door latch. Look for any frayed or broken wires that could disrupt the latch’s functionality. Damaged wiring can often lead to error codes and operational issues.
- Test the Door Latch and Heater Sensor – Using a multimeter, test the continuity of both the door latch and the heater sensor. This step will help you confirm whether these components are functioning correctly. If either part fails the test, it may need to be replaced.
Fix for Cause 4
A malfunctioning drain pump can often be the culprit behind the F9 E3 error code in your Whirlpool washer. To begin troubleshooting, ensure you unplug the washer for safety. Start by inspecting the drain pump for any blockages or debris that may be obstructing its operation. If the pump seems clear, the next step is to check the wiring. Look for any damaged or loose connections that could impact the pump’s functionality.
After you’ve checked the wiring, it’s important to test the heater sensor to ensure it’s working correctly. Using a multimeter, check for continuity; if the sensor is faulty, it will need to be replaced. Once you have addressed these potential issues, reassemble the washer, plug it back in, and run a short cycle to see if the error code reappears.
Call a Professional If
If you’re facing the F9 E3 error code on your Whirlpool washer and haven’t been able to resolve it, it’s crucial to consider reaching out to a professional technician. Tackling this issue without the proper expertise can lead to further complications and potentially more costly repairs. Here are some key indicators that it’s time to call for help:
- Unsuccessful Troubleshooting: If you’ve gone through standard troubleshooting steps—like resetting the machine and checking for blockages—but the error remains, it’s a sign that the problem could be more complex than it appears.
- New Parts, Same Issue: If you’ve replaced the heater sensor and the F9 E3 code still persists, it indicates that there might be an underlying issue that requires professional diagnosis.
- Discomfort with Electrical Components: If you feel uneasy about handling electrical parts or wiring, it’s best to leave the repairs to someone with the right training. Safety should always be your top priority.
- Signs of Malfunction: Unusual noises, leaks, or any other irregularities during the washer’s operation are warning signs that require immediate attention from a qualified technician.
Professional repair technicians have the experience and tools necessary to accurately diagnose and fix intricate problems, ensuring your washer runs safely and efficiently. Don’t hesitate to seek their assistance to get your appliance back in working order. Remember, a reliable solution is just a call away!