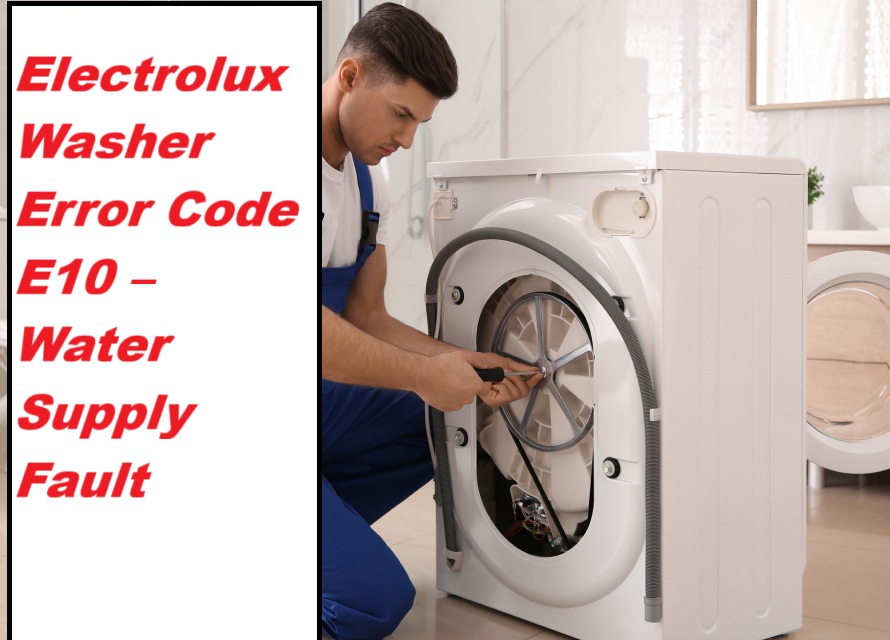
If you’re feeling frustrated because your Electrolux washer has suddenly displayed the E20 error code right when you need it most, you’re not alone. This specific error code indicates a drainage issue, which can be a real hassle. But don’t worry—this is a common problem, and many of its causes have straightforward DIY solutions.
One common cause of the E20 error is a clogged drain filter, which can prevent water from draining properly. To tackle this issue, I encourage you to read through the entire post. We’ll cover everything you need to know about the E20 error code, including additional causes and step-by-step solutions.
With a little guidance, you can get your laundry routine back on track in no time!
What Does the Error Code Means?
When your Electrolux washer shows the error code E20, it signals a drainage issue that needs your attention. This error means that your washer is having trouble effectively removing water, which can both waste water and reduce energy efficiency. When your appliance struggles to drain, it not only leads to excess water usage but can also cause unnecessary energy consumption during the washing cycle.
Proper drainage is crucial for your washer to operate at its best. It ensures that your machine uses just the right amount of water and energy, helping you save on utility costs and support eco-friendly practices. To keep your washer running smoothly and efficiently, it’s important to address the E20 error quickly. A systematic diagnostic process is recommended for troubleshooting, which includes inspecting the drainage system for blockages.
Here are a few steps you can take to troubleshoot this issue:
- Check the Drain Hose: Make sure the drain hose is not kinked, clogged, or placed too high. The hose should be positioned at the recommended height according to the manufacturer’s guidelines.
- Inspect the Drain Pump: If the hose looks fine, the next step is to check the drain pump for any obstructions. Remove any debris that may be blocking the pump’s filter or impeller.
- Examine the Filter: Some models have a filter that can become clogged with lint, coins, or other debris. Cleaning the filter regularly can help prevent drainage issues.
- Look for Blockages in the Drain: Ensure that the drain itself is clear. A blocked drain can prevent water from escaping.
If you’re uncomfortable performing these checks or if the error persists after troubleshooting, it may be time to consult a professional technician. Addressing drainage problems promptly not only enhances your washer’s lifespan but also aids in resource conservation and reduces your utility bills. Remember, your appliance’s efficiency is in your hands!
Common Causes Behind Error Code
Common Causes of Electrolux Washer Error Code E20
The E20 error code typically indicates a drainage issue within the washer, often caused by a clogged drain hose, a malfunctioning pump, or a blockage in the filter. Additionally, power interruption during the wash cycle can also lead to operational issues that may trigger the E20 error.
Clogged Drain Filter
A clogged drain filter can often trigger error code E20 in Electrolux washers, as it hinders proper water drainage during cycles. To prevent this issue, regular maintenance is key. I recommend inspecting the filter every few months or sooner if you notice any drainage problems.
Here’s how to do it safely and effectively:
- Unplug the Washer: Always start by unplugging your machine to ensure your safety while working on it.
- Locate the Drain Filter: This is typically found at the front bottom of the unit. You may need to open a small door or panel to access it.
- Remove the Filter: Carefully unscrew or pull out the filter, ensuring you have a towel or shallow pan ready to catch any residual water that may spill out.
- Clean the Filter: Rinse it thoroughly under running water to remove any lint, debris, or foreign objects that may be blocking the flow. A soft brush can be helpful for stubborn buildup.
- Reinstall the Filter: Once it’s clean and dry, reinsert it securely back into the machine. Additionally, regular maintenance of the drain filter can help prevent issues like the F5 E4 error, which indicates problems with the door latch mechanism.
Faulty Water Level Sensor
If you’ve ruled out the drain filter as the source of the problem, a faulty water level sensor could be the culprit behind the E20 error code in your Electrolux washer. This essential component is responsible for monitoring the water level throughout the wash cycle, ensuring that your machine fills to the appropriate level. When the sensor malfunctions, it may erroneously signal the washer to overfill, resulting in the E20 error.
Common reasons for a faulty water level sensor include debris accumulation, electrical issues, or natural wear and tear over time. To address this, first check for any clogs in the hose connected to the sensor and inspect all electrical connections for looseness or damage. If the sensor is indeed defective, replacing it is necessary to restore proper function. A faulty water level sensor can lead to incorrect water levels, which may hinder washer operation and efficiency.
For safety and accuracy, it’s always a good idea to refer to your user manual for specific instructions or consider consulting a professional technician. They can provide expert guidance on handling the water level sensor in your washer, ensuring that the repair is done correctly and safely. Your appliance deserves the best care!
Faulty Pressure Switch
While the water level sensor often takes center stage, it’s essential to recognize that a faulty pressure switch can also trigger the E20 error code in your Electrolux washer. The pressure switch plays a crucial role in accurately sensing the water level, determining when to fill or stop filling the drum. If this component malfunctions, it may incorrectly indicate that the water level is too high, causing your washer to stop its operation unexpectedly.
Common causes for pressure switch issues include blocked hoses, electrical problems, or debris buildup within the switch itself. It’s important to regularly inspect the pressure switch and its connections to ensure they are clear of obstructions and functioning properly. Here’s how you can address these issues:
- Check the Hoses: Start by examining the hoses connected to the pressure switch. Look for any kinks, blockages, or leaks that may affect its operation. If you find any blockages, carefully clean or replace the hoses as needed.
- Inspect Electrical Connections: Ensure that the electrical connections to the pressure switch are secure and free of corrosion. A loose or corroded connection can lead to faulty readings. If you notice any issues, consider cleaning the connections or replacing any damaged wires.
- Clean the Pressure Switch: Sometimes, debris can build up within the pressure switch itself. If you’re comfortable, you can remove the switch and clean it gently to ensure it operates smoothly. Regular maintenance can prevent error codes by cleaning the drain pump filter and addressing any potential issues before they escalate.
Malfunctioning Drain Pump
When troubleshooting the E20 error code, it’s crucial to consider not just the pressure switch but also the drain pump’s role in the washing machine’s operation. A malfunctioning drain pump can significantly affect water drainage, leading to potential overflow issues.
Start by inspecting the drain hose for any blockages. Debris, such as lint or small foreign objects, can restrict water flow and create pressure imbalances. If you notice that the drain pump isn’t activating, it could indicate an electrical issue. Check for damaged wiring or a blown fuse that might be preventing the pump from functioning.
Additionally, ensure the pump itself is free from clogs. Lint and foreign materials can impede its operation, leading to further complications. Regular maintenance and thorough inspections of the drain pump and its components can help you prevent issues that trigger the E20 error, ensuring proper water pressure and efficient washing cycles. Motor control board failure can also impact the drain pump’s functionality, so consider checking that as well.
Required Tools to Fix the Error
Essential Tools for Troubleshooting
In addition to the essential tools listed, having a multimeter for testing electrical components can significantly aid in diagnosing issues related to the error code.
Basic Tools
When you encounter the E20 error code on your Electrolux washer, having the right tools can significantly streamline your troubleshooting process. To effectively maintain your washing machine, it’s essential to gather a few key tools.
First and foremost, a multimeter is indispensable. This tool helps you check electrical components and ensure everything is functioning correctly. It allows you to measure voltage, continuity, and resistance, which can pinpoint issues within the machine.
Next, you’ll need a flathead and Phillips screwdriver. These will enable you to access the washer’s internal parts easily. Many components are secured with screws, and having both types of screwdrivers ensures you can handle any situation.
A pair of pliers is also essential. They come in handy for manipulating hoses and clamps, especially when you need to detach or secure components during your repairs.
Don’t forget to have a bucket or towel ready. This is crucial for managing any water leakage that may occur during your troubleshooting. It’s always wise to be prepared for unexpected spills.
Lastly, a flashlight is a valuable tool for improving visibility in tight spaces within your washer. Many components are hidden away, and good lighting can make all the difference when you’re trying to diagnose an issue. Additionally, be sure to inspect the door lock assembly as it can affect communication with the motor control system, which may relate to error codes.
Supplies
Gathering the right supplies is crucial for effectively addressing the E20 error code on your Electrolux washer. Here’s what you’ll need to get started:
- Multimeter: This tool is essential for testing the water inlet valve’s operation. It will help you determine if the valve is functioning correctly or if it needs replacement.
- Screwdriver Set: A good set of screwdrivers will allow you to access the water inlet valve and other components of your washer with ease. Make sure to have both flat-head and Phillips screwdrivers on hand.
- Bucket or Towels: To avoid a mess during the repair, keep a bucket or some towels handy. This will catch any excess water that may spill out when you disconnect the water lines.
- Replacement Parts: It’s wise to have a new water inlet valve ready, in case the one currently installed is faulty. This will save you time and ensure that you can complete the repair in one go.
- Pressure Gauge: This tool is helpful to measure the water pressure coming into your washer. Ensuring that the pressure meets your machine’s specifications can prevent future overflow issues. Additionally, you might want to have safety equipment on hand, such as gloves and goggles, to protect yourself during the repair process.
Pre-Safety Checklist Before Fixing
Before you start any repairs on your Electrolux washer, it’s essential to ensure your safety by adhering to a simple pre-safety checklist. These precautions help protect you from potential hazards while you work. Here’s what you need to do:
- Unplug the Washer: Always disconnect the washer from the electrical outlet. This step is vital for your electrical safety, preventing any risk of shock while you’re working.
- Turn Off the Water Supply: Locate the water shut-off valves and turn them off. This action prevents any leaks or flooding that could occur during your repairs.
- Wear Personal Protective Equipment (PPE): Equip yourself with gloves and safety goggles. This gear protects your hands and eyes from sharp edges, chemicals, or debris you might encounter.
- Create a Safe Workspace: Ensure your work area is dry and free of clutter. This minimizes the risk of slips and falls, allowing you to focus on the task at hand without distractions.
- Keep Children and Pets Away: It’s crucial to maintain a safe environment. Make sure that children and pets are kept at a safe distance from the repair area to prevent accidents.
Additionally, ensure you have a basic troubleshooting kit on hand, as this can aid in diagnostics if you encounter any electrical issues during repairs.
Diagnose the Error Code
To effectively diagnose the E20 error code on your Electrolux washer, it’s important to understand what this code signifies. The E20 error typically points to a water overflow issue, which can disrupt your washing cycle and potentially damage key components of your machine.
Here’s a step-by-step guide to help you troubleshoot this error:
- Check the Water Supply: Ensure that the water supply to the washer is turned on and functioning properly. Low water pressure can sometimes trigger the E20 error.
- Inspect the Drain Hose: Look for any kinks, blockages, or obstructions in the drain hose. If the hose is bent or clogged, it could prevent proper drainage and lead to overflow.
- Examine the Pressure Switch and Hose: The pressure switch is responsible for detecting water levels in the drum. If this component or its hose is malfunctioning, it may falsely signal an overflow condition. Make sure to check for any cracks or blockages.
- Test the Water Inlet Valve: The water inlet valve controls the flow of water into your washer. If it’s not functioning correctly, it may allow too much water in, resulting in an overflow. Inspect the valve for any signs of damage or wear.
Step-by-Step DIY Troubleshooting Guide
Transitioning to Troubleshooting Steps for E20 Error Code
Clean the Drain Filter
Cleaning the drain filter in your Electrolux washer is a crucial step in addressing the E20 error code, which indicates a drainage issue. A clogged filter can significantly hinder your washer’s ability to drain water effectively. Here’s how to safely clean the drain filter with confidence.
- Safety First: Begin by unplugging your washer from the electrical outlet. This is an important step to prevent any electrical hazards while you work on the machine.
- Locate the Drain Filter: The drain filter is typically found at the front bottom of the washing machine. It may be behind a small door or panel.
- Prepare for Water Spillage: Before opening the filter, it’s wise to place a shallow container or a towel underneath it. This will catch any excess water that may spill out when you remove the filter.
- Open the Filter Cover: Carefully open the filter cover. If it’s a bit stiff, you may need to gently wiggle it to get it open without breaking it.
- Remove the Filter: Slowly unscrew the filter, allowing any trapped water to drain into your container. Take your time with this step to avoid making a mess.
- Clean the Filter: Rinse the filter thoroughly under running water. Use a soft brush or cloth to remove any debris, lint, or buildup from detergent residue. It’s essential to ensure that the filter is completely clean, as any leftover particles can lead to future drainage issues.
- Reassemble the Filter: Once the filter is clean, carefully screw it back into place. Ensure it’s secured properly to prevent leaks.
- Close the Filter Cover: After reassembling, close the filter cover securely.
- Test Your Washer: Plug your washer back into the electrical outlet and run a short washing machine cycle. This will help you confirm that the drainage system is functioning correctly.
Regularly maintaining the drain filter is key to preventing future issues with your washer. Taking the time to clean it every few months can save you from more significant problems down the line. If you continue to experience drainage issues, it may be time to consult a professional technician for further assistance.
Replace Water Level Sensor
If you’re still facing the E20 error code after cleaning the drain filter, it could be a sign that the water level sensor is malfunctioning. This is a common issue that can be resolved with a bit of effort. First and foremost, for your safety, make sure to unplug your washer before starting any repairs.
Next, you’ll need to locate the water level sensor, which is usually situated near the bottom of your washer. Once you find it, carefully disconnect the wiring harness connected to the sensor. Take a screwdriver and remove the mounting screws securing the faulty sensor in place, then gently remove it.
Now, it’s time to install the new water level sensor. Simply reverse the steps you took to remove the old one. Ensure that the new sensor is securely attached and that the wiring harness is properly connected.
After reassembling everything, plug your washer back in and run a test cycle. This will help you verify whether the E20 error code has been resolved. If the code continues to appear, it might be necessary to conduct further troubleshooting to identify any additional issues. Remember, taking your time and following these steps carefully can make a significant difference in successfully repairing your washer.
Replace Pressure Switch
A malfunctioning pressure switch can trigger the E20 error code in your Electrolux washer, indicating a potential issue with water levels. Replacing this component is a straightforward process that you can handle safely. Here’s how to do it step-by-step:
- Safety First: Always begin by unplugging your washer from the electrical outlet. This ensures your safety while you work on the appliance.
- Locate the Pressure Switch: The pressure switch is usually found near the top of the tub, often hidden behind the control panel or a cover. Refer to your washer’s manual if you need help pinpointing its exact location.
- Disconnect the Wiring Harness: Carefully detach the wiring harness connected to the pressure switch. Make sure to note how the wires are arranged or take a picture for reference during reassembly.
- Remove the Mounting Screws: Use a suitable screwdriver to take out the screws securing the pressure switch in place. Keep these screws in a safe spot, as you’ll need them to install the new switch.
- Replace the Old Switch: Gently remove the old pressure switch from its housing. Now, take the new pressure switch and install it, ensuring that it’s securely mounted in the same position as the old one.
- Reconnect the Wiring Harness: Carefully reconnect the wiring harness to the new pressure switch, ensuring that each connection is tight and secure to prevent any electrical issues.
- Reassemble and Test: Once everything is back in place, plug the washer back into the outlet. Run a test cycle to check if the E20 error code has cleared. If the code persists, it may be time to revisit your troubleshooting steps or consult a professional technician for further assistance.
Repair Drain Pump Assembly
After you’ve addressed the pressure switch, the next step in troubleshooting the E20 error code may involve the drain pump assembly. Safety is paramount, so start by unplugging your washer to ensure there’s no power running to the machine.
Next, locate the drain pump, which is often situated at the bottom of the washer. You’ll need to remove the access panel to reach it. Once you have access, carefully disconnect any wires attached to the pump—make sure to note where each wire goes for reassembly.
Now, take a close look at the drain pump itself. Inspect it for any clogs or debris that could be obstructing its operation. If you find any blockages, clear them away; a simple obstruction can often lead to significant issues.
It’s also a good idea to test the pump with a multimeter. This tool will help you determine if the pump is functioning properly. If the multimeter readings indicate that the pump is faulty, you will need to replace it with a new unit.
Once you have the new drain pump, reconnect the wires according to your notes, and reassemble the access panel securely.
Finally, plug the washer back in and run a test cycle. This will help you confirm that the water overflow issue has been resolved. Remember, addressing these issues promptly can help extend the life of your washer and keep it running smoothly.
Call a Professional If
When troubleshooting an Electrolux washer that shows the error code E20, it can be frustrating if basic fixes don’t work. If your efforts haven’t resolved the issue, it may be time to call in a professional. This is especially important in situations involving persistent leaks, electrical problems, or intricate internal components. Professional services can provide the expertise necessary to prevent further damage and ensure your appliance operates safely.
Here are some signs that indicate it’s time to seek professional help:
| Signs to Call a Professional | Reason | Action Required |
|---|---|---|
| Persistent leaks | Potential internal damage | Immediate inspection needed |
| Electrical issues | Safety hazards | Professional diagnosis needed |
| Persistent error code E20 | Complex system failure | Expert repair services needed |
If you’re feeling uncertain about how to proceed, don’t hesitate to reach out for professional support. It’s always better to ensure safety and reliability when dealing with appliance issues.