We understand how frustrating it can be to encounter issues with your washing machine, especially when you see the Amana Washer Error Code F9 E1 flashing before you.
This specific code indicates a drain pump fault, which can throw a wrench in your laundry routine. But don’t worry—this is a common issue that many people face, and there are often simple DIY solutions to get your washer back on track.
In layman’s terms, the F9 E1 error means that the washer is having trouble draining water properly. One common cause of this error could be a clogged drain hose, preventing water from flowing out as it should.
If you’re dealing with this pesky error code, we encourage you to read through the entire post to discover not only this potential cause but also other reasons behind the error and effective steps you can take to resolve it.
Let’s get your laundry back to normal!
What Does the Error Code Means?
When your Amana washer shows the error code F9 E1, it signals an issue with the door lock mechanism. This code indicates that the washer is unable to verify that the door is properly closed, which prevents it from starting or completing any wash cycles. To resolve this problem, I recommend a few troubleshooting steps.
First, take a close look at the door latch. Check for any visible damage or obstructions that might be preventing it from engaging fully. Make sure there’s no debris blocking the latch or the strike plate that it connects with. Sometimes, even a small item can cause a significant issue.
Examine the door latch for damage or debris, as even minor obstructions can prevent it from closing properly.
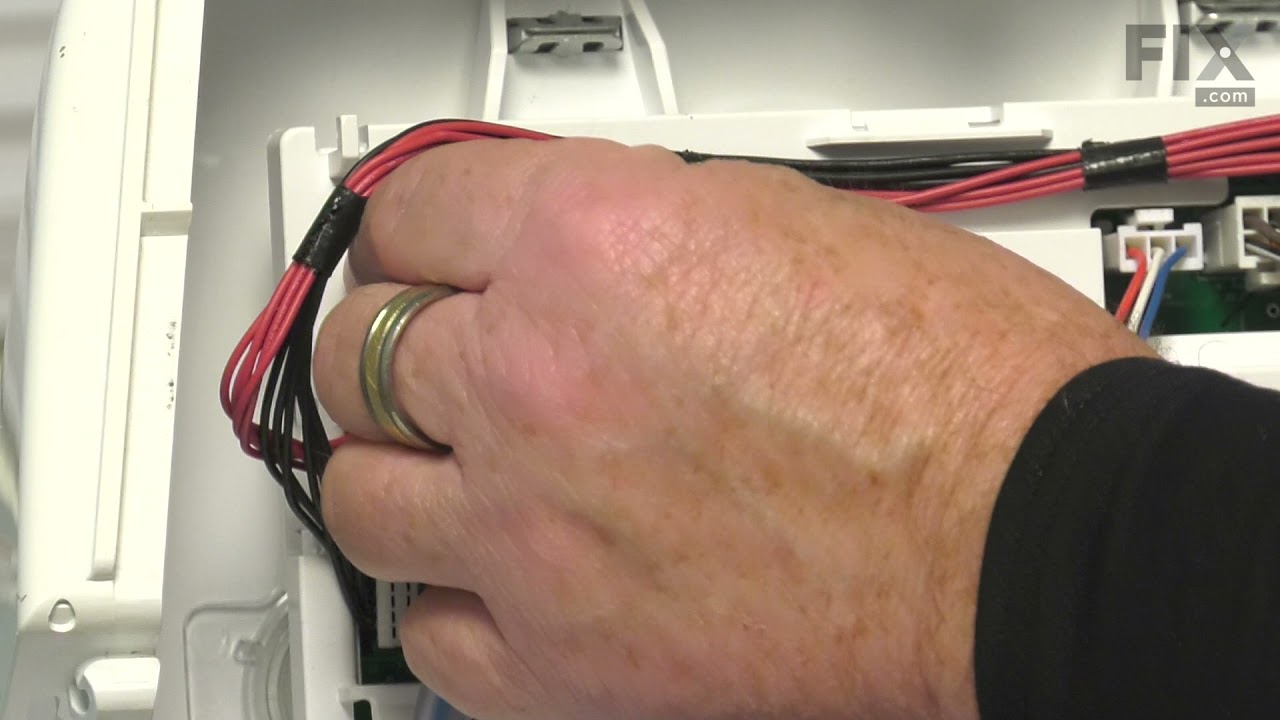
Next, inspect the wiring connections leading to the door lock assembly. Look for any signs of wear, fraying, or disconnection. A loose or damaged wire can easily disrupt the communication between the door lock and the washer’s control board.
If you’ve gone through these steps and the error persists, it may be time to consider replacing the door lock assembly itself. This part can wear out over time and may need a replacement to ensure your washer functions correctly. Additionally, similar to the F21 error code, which indicates drainage issues in Whirlpool washers, it’s essential to ensure that all components are functioning properly for optimal performance.
Always keep your user manual handy, as it provides specific error code meanings and additional troubleshooting guidance tailored to your model. Remember, safety first! Always unplug your washer before attempting any repairs to avoid electrical hazards. By following these steps, you can empower yourself to tackle this common issue and get your washer back in working order.
Common Causes Behind Error Code
Common Causes of F9 E1 Error Code in Amana Washers. Issues with the door lock mechanism can affect drain pump engagement, leading to this error.
Clogged Drain Hose
A clogged drain hose can significantly impact your Amana washer’s performance, leading to the frustrating F9 E1 error code. This issue often stems from improper installation or neglecting routine maintenance. To ensure your washer operates smoothly, start by checking the positioning of your drain hose. Make sure it is straight and free of kinks and bends, as these can block water flow.
Regular inspections are crucial. Look for any blockages caused by lint, debris, or soap residue that may have built up over time. Additionally, examine the hose for signs of damage, such as cracks or leaks, as a compromised hose can worsen drainage problems. Proper drain hose installation ensures optimal drainage and prevents future error codes.
Keeping your drain hose clean and well-maintained not only prevents the F9 E1 error but also ensures that your washer functions at its best. Addressing these issues promptly can help you avoid more significant mechanical problems in the future. Remember, a little preventive care goes a long way in keeping your appliance running smoothly. If you encounter difficulties or need further assistance, don’t hesitate to reach out for professional help. Your washer’s performance is worth the effort!
Faulty Drain Pump
The drain pump is a crucial component of your Amana washer, and when it malfunctions, it can trigger the F9 E1 error code. A faulty drain pump can arise from several issues, such as normal wear and tear over time or debris obstructing its mechanism. If you overlook proper maintenance of the drain pump, you may experience reduced washer performance, including inefficient drainage and even leaks.
To keep your washer running optimally, it’s important to regularly inspect the drain pump for any foreign objects or lint buildup that could impede its function. Additionally, ensure that the pump’s impeller is in good condition and can rotate freely without obstruction. Regular maintenance can help prevent issues related to malfunctioning fill valves that may exacerbate drainage problems.
Faulty Wiring Connections
Faulty wiring connections can be a common culprit behind the F9 E1 error code in your Amana washer. To tackle this issue effectively, it’s essential to conduct a comprehensive inspection of the wiring. Start by examining the connections between the drain pump and the control board for any signs of looseness, damage, or corrosion. Even a slight disruption in these connections can hinder the pump’s operation, resulting in that frustrating error code.
Using a multimeter, you can test for voltage continuity within the wiring. This step is critical as it allows you to pinpoint any areas that may be problematic. If you do discover any damaged wires, replacing them is necessary to restore proper functionality to your washer. Additionally, ensure that there are no malfunctioning components that could further complicate the issue.
Always remember to ensure that all connections are secure and intact. Taking these precautions not only helps eliminate the F9 E1 error but also ensures that your washer operates smoothly for years to come. Your safety is paramount, so make sure to unplug the washer before conducting any inspections or repairs. By following these steps, you empower yourself to tackle this common issue with confidence.
Failed Control Board
When your Amana washer shows the F9 E1 error code, it could be a sign of a failed control board, which is a common issue we encounter. The control board is essentially the brain of your washer, responsible for managing all its functions. If there are circuit issues, this can prevent the control board from effectively communicating with other components, leading to drainage problems.
First, inspect the control board for any visible signs of damage, such as burnt connections or scorched areas. These signs can indicate that the board has experienced excessive heat or electrical issues, which can disrupt its functionality. Additionally, check for any loose or corroded connectors attached to the board. These can hinder the board’s performance, leading to errors like F9 E1.
If you determine that the control board is indeed faulty, replacing it is often the best solution to resolve the error and get your washer back to working order. It’s important to recognize that the main control board manages cycle timing and sensor readings, so addressing any issues promptly can prevent significant complications. Always prioritize safety by disconnecting the power supply before attempting any repairs. If you’re unsure about any step in the process, don’t hesitate to consult with a professional technician who can guide you. Your safety and the proper functioning of your appliance are the top priorities.
Required Tools to Fix the Error
Gather Your Tools for Repair Ensure you have the necessary tools to diagnose and fix issues related to door switch failure, as this can often be a common cause of washer problems.
Basic Tools
To address the Amana washer error code F9 E1, having the right tools for the job is crucial. These tools will not only streamline your maintenance tasks but also enable you to diagnose and resolve the drain pump issue effectively. Here’s a list of the essentials you’ll need:
- Screwdriver Set – A good variety of both Phillips and flathead screwdrivers is necessary to access the internal components of your washer safely. Different screws may require different types, so having both on hand is important.
- Multimeter – This tool is invaluable for checking the functionality of electrical components. With a multimeter, you can test for continuity and voltage, ensuring that your washer’s electrical systems are operating as they should.
- Pliers – A pair of pliers will be helpful for gripping and adjusting hoses or clamps during your repairs. This can be especially useful when you need to disconnect or manipulate parts in tight spaces. Additionally, always ensure that you are using the correct type and amount of detergent to avoid further issues during your washer maintenance.
Supplies
Gathering the right supplies is essential for effectively addressing the Amana washer error code F9 E1. To ensure proper drain maintenance and a successful repair, you’ll need the following tools and parts:
- Screwdriver Set: A variety of screwdrivers will be necessary to access the drain pump assembly. Make sure to have both Phillips and flathead screwdrivers to tackle different screws you may encounter.
- Bucket: This is crucial for catching any residual water when you detach the drain pump. Having a bucket on hand will help prevent messy spills and keep your workspace tidy.
- Replacement Drain Pump: If the existing pump is malfunctioning, having a compatible replacement drain pump ready will expedite the repair process. Be sure to check the model specifications for compatibility with your washer.
Additionally, ensure to check for any door latch mechanism issues that could also affect the washing process.
With these supplies prepared, you’ll be well-equipped to troubleshoot and resolve the F9 E1 error efficiently. Remember to prioritize safety while working on your washer—unplug the appliance before starting any repairs and be cautious of sharp edges and electrical components. Following these guidelines will help you navigate the repair process safely and effectively.
Pre-Safety Checklist Before Fixing
Before you tackle the Amana washer displaying the F9 E1 error code, it’s essential to prioritize your safety by following a comprehensive pre-safety checklist. Here’s how to ensure a secure working environment:
- Wear Appropriate Safety Gear: Always put on gloves and safety goggles. This simple step protects you from sharp edges and any potential water hazards that may arise during the repair process.
- Unplug the Washer: Disconnecting the power supply is a crucial step. This action eliminates the risk of electrical shock while you work on the appliance. Remember, safety first!
- Inspect for Leaks: Take a moment to examine the area around your washer for any signs of water leaks. These can create slip hazards and may lead to electrical dangers. If you notice any leaks, address them before proceeding with your repairs. Additionally, ensure to check for power interruptions that might affect the washer’s performance during the troubleshooting process.
Diagnose the Error Code
Diagnosing the F9 E1 error code on your Amana washer can seem daunting, but with a methodical approach, you can effectively identify the issue at hand. Here’s a step-by-step guide to help you through the process.
- Check the Drain Pump: The first step is to listen carefully to the washer during its operation. If you hear unusual sounds, it could indicate that the drain pump is blocked or malfunctioning.
- Inspect the Drain Hose: Next, examine the drain hose thoroughly. Look for any kinks or clogs that might impede water flow. A restricted drain hose can lead to drainage issues, triggering the F9 E1 error.
- Examine for Debris: Ensure that the drain pump itself isn’t obstructed by any debris. Sometimes, small objects can get lodged in the pump, impacting its performance.
- Test Electrical Connections: If you have access to a multimeter, this tool can be invaluable for testing the pump’s electrical continuity. Check the connections to ensure that they are intact and functioning properly.
Step-by-Step DIY Troubleshooting Guide
Transitioning to Troubleshooting Steps
Clear the Drain Hose
To effectively address the F9 E1 error code on your Amana washer, it’s crucial to clear the drain hose, as any blockage can hinder proper drainage. Let’s walk through the steps together to ensure you’re doing this safely and effectively.
- Safety First: Begin by unplugging the washer from the power outlet. This is a vital step to prevent any electrical hazards while you work.
- Locate the Drain Hose: The drain hose is typically found at the back of the washing machine. Take a moment to assess the area around the hose.
- Inspect for Kinks or Blockages: Carefully examine the hose for any kinks, twists, or visible obstructions. Even minor bends can restrict water flow.
- Disconnect the Hose: Detach the drain hose from both the washing machine and the drain. Be prepared for some residual water to spill out, so have a towel or bucket handy.
- Check for Blockages: Use a flashlight to look inside the drain hose for any debris or clogs. If you find anything obstructing the flow, it’s time to clear it out.
- Clear Debris: Use a flexible brush or run water through the hose to remove any blockages. Make sure the hose is completely clear before reattaching it.
- Reattach the Hose: Securely reconnect the drain hose to both the washer and the drain, ensuring it’s not twisted or kinked.
- Regular Maintenance: Incorporating regular checks of your drain hose into your maintenance routine can help prevent future issues. This proactive approach will keep your washer running smoothly for years to come.
Inspect Drain Pump Wiring
Before beginning any repairs, it’s crucial to inspect the wiring of the drain pump, as damaged connections can cause the F9 E1 error code to continue appearing. A thorough drain pump inspection can help you identify any visible issues. Here’s a step-by-step guide to effectively troubleshoot the wiring:
| Step | Action | Notes |
|---|---|---|
| 1 | Unplug the washer | Always prioritize safety first |
| 2 | Access the drain pump | Carefully remove necessary panels to gain access |
| 3 | Inspect wiring connections | Look for any frays, broken wires, or signs of corrosion |
| 4 | Test continuity with a multimeter | Ensure that proper voltage is being delivered |
Taking these steps will help you pinpoint any wiring issues that may be affecting the drain pump’s performance. Remember, safety is paramount, so always disconnect power before working on your appliance. If you’re unsure at any point, consider consulting with a professional technician to avoid any potential hazards.
Repair Damaged Wiring Connections
After inspecting the wiring connected to your drain pump, you may discover some damaged connections that require prompt attention. The first step is to ensure your safety by turning off the power to your washer. This is crucial before you begin any repair work.
Next, gently remove the insulation from the damaged wiring to reveal the underlying wires. Take a close look for any frayed or broken strands; if you find any damage, use wire strippers to carefully trim the ends of the wires until you have clean, intact strands.
Once you have prepared the wires, twist them together securely to restore a stable connection. This is a vital step to ensure that the connection can handle the electrical load without failing again. To provide optimal protection against future issues, you should cover the connections with heat-shrink tubing or wrap them thoroughly with electrical tape.
Be sure to double-check that all connections are tight and properly insulated. This will help prevent any potential short circuits or electrical problems down the line.
After you’ve completed the repair, it’s time to restore power to your washer. Turn it back on and test the drain pump to make sure it operates smoothly. If everything runs as it should, you’ve successfully repaired the wiring and can feel confident in your work! If you encounter any further issues, don’t hesitate to seek professional help.
Replace the Control Board
Replacing the control board in your Amana washer might seem daunting at first glance, but with a step-by-step approach, it’s a task you can handle confidently. Here’s how to do it safely and effectively.
Step 1: Ensure Safety First****
Before you begin, unplug your washer from the electrical outlet. This is a crucial step to prevent any risk of electric shock while you’re working on the appliance.
Step 2: Access the Control Board****
Next, remove the back panel of the washer. This will give you the access you need to the control board. Be sure to keep track of the screws and any other components you remove during this process.
Step 3: Disconnect the Wiring Harness****
Carefully disconnect the wiring harness attached to the control board. It’s helpful to take a picture or make a note of where each wire is connected for easy reassembly later on. This will save you time and prevent mistakes.
Step 4: Remove the Old Control Board****
Unscrew the control board from its housing and gently lift it out. Before proceeding with the installation of the new board, take the time to inspect the old board for any visible damage, such as burnt components or broken traces. Understanding the nature of the failure can be beneficial for future troubleshooting.
Step 5: Install the New Control Board****
Now, it’s time to install the new control board. Make sure that it is aligned correctly and that all connections are secure. Double-check that each wire is connected to the appropriate terminal as per your earlier notes or photos.
Step 6: Reassemble the Washer****
Once the new control board is in place, replace the back panel and secure it with the screws you removed earlier. This will complete the installation process.
Step 7: Final Testing****
Plug the washer back into the outlet and run a test cycle. This is an essential step to ensure that the new control board is functioning correctly and that the previous error code, F9 E1, has been resolved.
Call a Professional If
If you’ve attempted to troubleshoot your Amana washer and the F9 E1 error code continues to appear, it may be time to reach out to a professional technician. Continuing to operate the washer under these conditions could result in more significant issues down the line. Technicians possess the necessary tools and expertise to accurately diagnose the problem, ensuring that repairs are thorough and effective.
Here are some indicators that you should consider calling for professional help:
| Signs to Call | Preventive Maintenance Tips | Professional Benefits |
|---|---|---|
| Persistent error codes | Regularly clean your filters to prevent clogs | Access to expert diagnostics that pinpoint the issue |
| Unusual noises during operation | Schedule yearly maintenance checks to keep everything in good condition | Warranty protection on parts and labor |
| Water leakage from the washer | Inspect hoses and connections monthly for wear and tear | Efficient repairs that save you time and effort |
| Inconsistent cleaning performance | Regularly test water levels to ensure proper function | Long-term solutions that enhance appliance longevity |
| Frequent error messages or interruptions | Maintain proper load sizes to avoid strain on the motor | Peace of mind knowing the job is done right |
Investing in professional assistance not only saves you time and hassle but also restores your washer to optimal functionality, allowing you to do laundry with confidence. Remember, it’s always better to be safe and proactive when it comes to appliance maintenance.