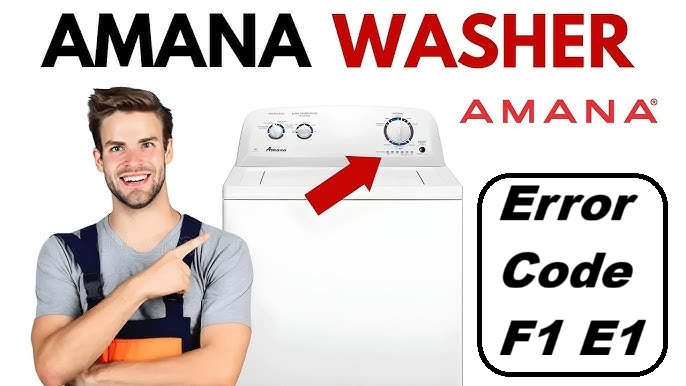
Dealing with your Amana washer displaying the F2 E1 error code can be incredibly frustrating.
This code indicates that there’s a problem with the water filling process in your machine, which can often be attributed to a locked door or an issue with your water supply.
Don’t worry—this is a common problem, and many of the solutions are straightforward and can be tackled without professional help.
One frequent cause of this error is a kinked or blocked water supply hose, which can easily disrupt the flow of water into your washer.
To get to the bottom of this issue, I recommend reading through this entire post where we’ll explore not only this cause but also other potential reasons behind the F2 E1 error.
Understanding these aspects can help you resolve the problem quickly and get your laundry routine back on track!
What Does the Error Code Means?
When your Amana washer displays the error code F2 E1, it signifies an issue with the door lock mechanism. This error indicates that the washer cannot confirm that the door is securely locked, which prevents it from starting or completing any cycle.
To resolve this issue, start by ensuring that the door is fully closed; sometimes, it may appear closed but isn’t properly latched. If the door is indeed secure, the next step is to unplug the washer for a few minutes. This can help reset the control board, potentially clearing the error.
While you’re waiting, take a moment to inspect the door latch and the wiring connected to it. Look for any visible signs of damage, wear, or obstructions that might be interfering with the locking mechanism. A faulty door lock assembly can often be the root cause of such errors.
If you’ve followed these troubleshooting steps and the error persists, it might be time to consider replacing the door lock assembly. If you’re unsure or uncomfortable performing repairs, I recommend consulting a professional technician who can accurately diagnose and fix the issue. Your safety and the functionality of your appliance are paramount, so don’t hesitate to seek help if needed.
Common Causes Behind Error Code
Common Issues Leading to F2 E1 Error Code. Additionally, low water pressure can trigger inaccurate water level detection, compounding the problem.
Clogged Water Inlet Filter
If your Amana washer is showing the F2 E1 error code, a clogged water inlet filter may be the cause. This issue often arises from poor water quality, which can lead to sediment buildup that obstructs the filter and disrupts the water flow necessary for optimal performance. To prevent this problem, regular maintenance of the filter is crucial. Additionally, be aware that a malfunctioning drain pump can also cause water flow issues and contribute to error codes like F2 E1.
Let’s break down the common factors that contribute to a clogged water inlet filter:
| Factor | Description |
|---|---|
| Sediment Build-up | Accumulation of minerals and debris present in the water supply. |
| Hard Water | Water with a high mineral content that can lead to scale formation. |
| Infrequent Maintenance | Failing to clean the filter regularly can result in blockages. |
| Old or Worn Filter | Over time, filters can degrade, reducing their effectiveness. |
| Installation Issues | An improperly installed filter can hinder water flow and lead to clogs. |
Faulty Water Inlet Valve
A faulty water inlet valve can indeed trigger the F2 E1 error code on your Amana washer, particularly if you’ve already checked for issues like a clogged water inlet filter. When the valve malfunctions, it may restrict or completely block the flow of water into the machine, which prevents it from filling properly.
To diagnose a potential issue with the water inlet valve, you can perform a simple test using a multimeter. Start by unplugging your washer to ensure safety, then locate the water inlet valve. Disconnect the wires from the valve and set your multimeter to the continuity setting. Touch the probes to the terminals of the valve; if you don’t hear a beep or see a reading, the valve likely does not have continuity and should be replaced.
While you’re inspecting the valve, take a moment to check for any visible signs of physical damage or mineral buildup. Both of these factors can affect the valve’s ability to function properly. It’s crucial to ensure that the water inlet valve operates correctly, as this is key to resolving the F2 E1 error code and restoring your washer’s performance. Additionally, make sure to check home water pressure as insufficient pressure can prevent the valve assembly from opening. Remember, if you’re ever unsure, don’t hesitate to consult a professional technician for assistance. Safety should always be your top priority!
Faulty Pressure Switch
One common reason for the F2 E1 error code in your Amana washer is a faulty pressure switch. This essential component is responsible for monitoring the water level in your washer, ensuring it fills correctly for each cycle. When the pressure switch malfunctions, it can lead to issues such as overfilling or underfilling, which can disrupt your laundry routine.
| Symptoms | Solutions |
|---|---|
| Inconsistent water level | Perform pressure switch troubleshooting |
| Error code displayed | Replace the pressure switch |
| Washer won’t fill correctly | Inspect connections and hoses |
To tackle this issue, begin with pressure switch troubleshooting. Carefully inspect the wiring and connections for any signs of damage or wear. Ensure that the hoses are clear of obstructions and securely attached. If these checks don’t resolve the problem, you may need to replace the pressure switch. Remember, addressing a faulty pressure switch promptly can save you time and frustration down the line. Don’t let a malfunctioning component disrupt your laundry day! Additionally, check for abnormal noises during operation, as these could indicate further underlying issues that may need to be addressed.
Faulty Water Supply Line
A faulty pressure switch is one possible culprit for water level issues in your Amana washer, but don’t overlook the water supply line as another potential source of the F2 E1 error code. It’s crucial to examine the water supply line carefully for any kinks or twists. Even a small kink can significantly hinder water flow, leading to inadequate filling.
Start by ensuring that the hose is securely connected to both the water source and the washer itself. Take a moment to inspect the line for any signs of leaks or blockages, as these can also disrupt the water supply. If you notice any damage or wear on the hose, replacing it may be necessary to restore proper function.
Additionally, it’s important to confirm that your home’s water pressure is within the washer’s operational range, typically between 20-120 psi. Low water pressure can create ongoing filling issues, so checking this is a vital step in troubleshooting your washer. By following these steps, you can effectively address water supply line problems and help ensure your washer operates smoothly. Remember to also check for secure connections at the outlet to avoid any power-related issues that could affect the washer’s performance.
Required Tools to Fix the Error
Essential Tools for Troubleshooting the F2 E1 Error
In addition to the essential tools listed, having a multimeter can help ensure proper sensor functionality during diagnostics.
Basic Tools
Diagnosing and fixing the Amana washer error code F2 E1 can be straightforward if you have the right tools and take the necessary safety precautions. With over 20 years of experience in appliance repair, I’m here to guide you through this process. Here’s a list of essential tools you’ll need to tackle this issue effectively:
- Screwdriver Set – A reliable screwdriver set is crucial for removing panels and accessing the internal components of your washer. Make sure to have both Phillips and flathead screwdrivers handy.
- Multimeter – This tool is invaluable for testing electrical connections. It will help you diagnose issues, particularly with the water fill system, which is often a common culprit in error codes.
- Pliers – A good pair of pliers will assist you in gripping and securing hoses and fittings. This is particularly important when you need to disconnect or reconnect water supply lines.
- Bucket – Keep a bucket nearby to catch any water that may spill during the repair. This not only helps keep your workspace tidy but also prevents water damage. Additionally, maintaining regular maintenance can help prevent future issues with your washer.
Supplies
When you encounter the Amana washer error code F2 E1, having the right supplies at your disposal is essential for a successful repair. Let’s ensure you have everything you need to effectively address water fill issues. Here’s a list of recommended items to gather before you start:
- Multimeter – This handy tool will allow you to check electrical connections and verify that the water pressure is within acceptable limits. It’s crucial for diagnosing any electrical components related to the fill system.
- Adjustable Wrench – You’ll need this to easily tighten or loosen hose connections, ensuring a secure fit that prevents leaks.
- Screwdriver Set – A good set of screwdrivers will help you access the internal components of your washer without hassle, making your repair process smoother.
- Replacement Hoses – Always have a set of replacement hoses on hand. If the existing hoses are damaged or clogged, having new ones ready will save you time and frustration.
Equipped with these supplies, you’ll be well-prepared to diagnose and fix the F2 E1 error code efficiently. Additionally, having a multimeter for testing electrical components can significantly aid in pinpointing the source of the problem. Remember, regular maintenance is your best defense against future issues. Make it a habit to check water pressure periodically and clean out filters regularly. This proactive approach not only helps in preventing similar problems but also extends the lifespan of your washer. Stay safe and confident in your repair journey!
Pre-Safety Checklist Before Fixing
Before you dive into fixing your Amana washer, prioritizing safety is paramount. Adhering to these precautions will not only protect you but also ensure a smooth and effective troubleshooting process:
- Unplug the Washer: Always disconnect the power supply from the washer. This simple step is crucial to prevent the risk of electric shock while you’re working on the machine.
- Shut Off Water Supply: Turn off the water valves that supply your washer. This will prevent any potential leaks or flooding during the repair process, keeping your workspace safe and dry.
- Wear Protective Gear: Equip yourself with gloves and safety goggles. These protective items will guard against sharp edges and any unexpected splashes from water or detergent, ensuring your safety throughout the repair.
- Clear the Area: Take a moment to remove any obstacles around the washer. A tidy workspace not only enhances safety by minimizing trip hazards but also allows you to move freely and focus on the task at hand. Additionally, ensure that you check for loose electrical connections which can lead to unexpected operational issues.
Diagnose the Error Code
To effectively resolve the F2 E1 error code on your Amana washer, it’s essential to pinpoint the root cause of the problem. Here are some basic troubleshooting steps to guide you:
- Check Water Supply: Ensure that the water supply is turned on and that there are no interruptions. Low water pressure can trigger this error.
- Inspect Hoses and Filters: Look for any blockages in the water inlet hoses and filters. Over time, debris can accumulate, preventing water from entering the washer properly.
- Examine the Door Lock: The door lock mechanism is critical for the washer’s operation. Test the latch to ensure it engages and disengages correctly. A faulty door latch can prevent the washer from starting or completing cycles.
- Verify Washer Level: An unlevel washer can cause issues. Use a level tool to confirm that your washer is sitting flat on the floor. Adjust the feet as necessary to ensure stability.
- Control Panel and Electronics: If you’ve checked the above and the issue persists, consider resetting the washer by unplugging it for a minute and then plugging it back in. If the error continues, it may be time to consult a professional for a deeper diagnosis of the control board.
| Potential Cause | Troubleshooting Step |
|---|---|
| Clogged water inlet | Inspect and clean filters |
| Faulty door latch | Test the latch mechanism |
| Kinked hoses | Straighten or replace hoses |
| Control board error | Reset the washer or consult a pro |
Approaching the problem methodically will empower you to tackle the F2 E1 error effectively. Remember, safety first: always unplug the washer before performing any maintenance. If you feel uncomfortable at any point, don’t hesitate to seek professional help.
Step-by-Step DIY Troubleshooting Guide
Troubleshooting the F2 E1 Error Code
Clean the Inlet Filter
Cleaning the inlet filter of your Amana washer is a crucial step to ensure optimal water flow and prevent common error codes like F2 E1. Here’s a step-by-step guide to help you through the process safely and effectively:
- Safety First: Begin by unplugging your washer from the electrical outlet to ensure your safety while working on the appliance. Additionally, turn off the water supply to prevent any leaks.
- Locate the Inlet Filter: The inlet filter is typically situated at the point where the water hoses connect to the machine. You’ll need to access this area to proceed.
- Detach the Hoses: Carefully unscrew the hoses from the washer. It’s important to have a towel or small container handy to catch any residual water that might spill during this process.
- Remove the Filter: Once the hoses are detached, you can easily remove the inlet filter. Take a moment to inspect it for any visible signs of damage, such as cracks or bends. If the filter is compromised, it’s best to replace it to ensure proper function.
- Clean the Filter: Rinse the filter under warm water to remove any debris or mineral buildup. You can use a soft brush to gently scrub away stubborn deposits, but avoid using harsh chemicals that could damage the filter.
- Reattach Everything: After the filter is clean and inspected, reinsert it into its designated slot. Make sure it’s seated properly. Then, reconnect the hoses securely, ensuring there are no kinks or bends that could impede water flow.
- Restore Power and Water: Turn the water supply back on and plug the washer back into the electrical outlet. Check for any leaks around the hoses before running a cycle.
Replace Water Inlet Valve
If your Amana washer continues to display the F2 E1 error after you’ve thoroughly cleaned the inlet filter, it may be necessary to replace the water inlet valve. Here’s a step-by-step guide to help you through the process safely and effectively.
- Safety First: Begin by unplugging the washer from the electrical outlet to ensure your safety while working. It’s also crucial to turn off the water supply to prevent any leaks.
- Access the Valve: Next, you’ll need to remove the back panel of the washer. This may involve unscrewing several screws, so keep them in a safe place for reassembly later.
- Disconnect the Hoses: Once the back panel is off, locate the water inlet valve. Carefully disconnect the hoses attached to the valve. Make sure to note their positions for easy reassembly, as this will help ensure everything goes back together correctly.
- Remove the Old Valve: Unscrew the valve from its mounting and detach any electrical connectors. Take your time with this step to avoid damaging any surrounding components.
- Install the New Valve: Now, it’s time to install the new water inlet valve. Simply reverse the steps you took to remove the old one. Make sure that all connections—both the hoses and electrical connectors—are secure and in their correct positions.
- Reassemble the Washer: After you’ve successfully installed the new valve, replace the back panel and secure it with screws.
- Final Checks: Turn the water supply back on and plug your washer back into the outlet. Before running a full cycle, it’s a good idea to check for any leaks around the new valve to ensure everything is tight and secure.
- Test the Washer: Finally, run a short cycle to confirm that the issue has been resolved. Keep an eye on the washer during the cycle to ensure it operates smoothly without any error codes.
Replace Faulty Pressure Switch
After resolving the issue with the water inlet valve, the next possible cause of the F2 E1 error code may be a malfunctioning pressure switch. This crucial component monitors the water levels in your washer and communicates with the control board to ensure proper operation. You’ll typically find the pressure switch located near the control board or on the back panel of your washer.
Here’s a brief overview of the common types of pressure switches you might encounter:
| Pressure Switch Type | Description |
|---|---|
| Mechanical | Operates through a diaphragm that responds to water pressure. |
| Electronic | Utilizes sensors for precise water level detection. |
| Adjustable | Designed for user calibration to suit different settings. |
| Fixed | Pre-set for specific washer models, ensuring compatibility. |
| Dual | Capable of monitoring two different water levels simultaneously. |
If you determine that the pressure switch is faulty, replacing it can restore your washer’s functionality. Always refer to your washer’s manual for model-specific instructions, as this will guide you through the replacement process safely and effectively. Remember, working with electrical components can be hazardous, so ensure that the appliance is unplugged before starting any repairs. Your safety is the top priority!
Inspect Water Supply Connection
Before embarking on any complex repairs, it’s crucial to first inspect the water supply connection. Often, a simple issue in this area can trigger the F2 E1 error code. Begin by ensuring that both the hot and cold water supply valves are fully open. This step is vital, as partially closed valves can restrict water flow.
Next, check the connections at the back of your washer. Make sure that the hoses are securely attached and free from any kinks or damage, as these can impede water flow. It’s also important to inspect the inlet screens for debris or mineral buildup. If you notice any blockage, use a soft brush to carefully clean the screens, ensuring they are free from any obstructions.
Once you’ve completed these checks, turn on the water supply and observe for a consistent flow. If everything appears to be in order but the error code continues to persist, it may indicate a need for further investigation. This could involve examining additional components of the washer, but starting with the water supply connection is always a wise first step. Remember, safety and thoroughness are key as you work through these troubleshooting steps.
Call a Professional If
While you might be able to troubleshoot various issues with your Amana washer, there are certain situations where calling a professional is the best course of action. For instance, if you’ve confirmed that the water supply connection is secure and the error code F2 E1 continues to appear, it’s time to seek expert help. This particular error often points to potential problems with the water inlet valve, control board, or sensors—components that typically require specialized tools and knowledge for accurate diagnosis and repair.
Moreover, if you observe any leaks, hear unusual noises, or experience ongoing malfunctions, consulting a qualified technician is highly recommended. Attempting to resolve these issues on your own may not only complicate the problem but could also risk further damage to your washer or void your warranty.
Don’t hesitate to reach out for professional assistance; doing so ensures that your washer will function efficiently and safely, providing you with peace of mind and extending the life of your appliance. Your safety and the proper operation of your washer should always come first.