We understand how frustrating it can be when your GE washer suddenly stops working due to an error code. If you’re seeing the error code E31, it indicates a lid switch failure that’s preventing your washer from running.
In simple terms, this means that the washer thinks the lid is open when it’s actually closed, causing it to halt its operation.
Don’t worry—this is a common issue and often has straightforward DIY solutions. One common cause of this error could be a faulty lid switch itself.
To help you get your washer back up and running, we recommend reading through the entire post. This will give you a comprehensive understanding of the E31 error, including additional potential causes and steps for troubleshooting.
Let’s get started on resolving this issue together!
What Does the Error Code Mean?
What does the error code E31 mean on your GE washer? This code indicates a lid switch failure, which is an essential safety feature designed to prevent the washer from operating with the lid open. When you see this error, it’s important to conduct a thorough diagnosis to identify the underlying issue.
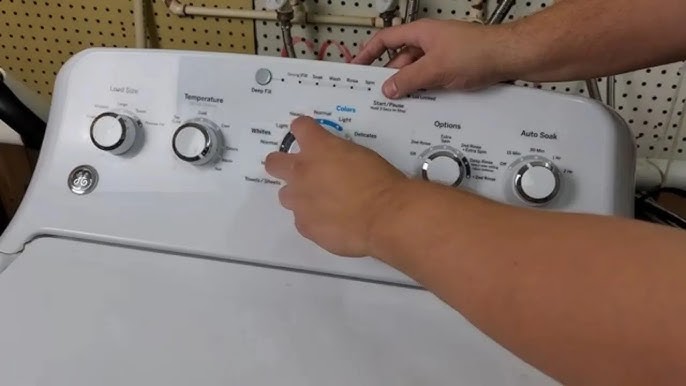
Start by inspecting the lid switch for any signs of damage or misalignment. Make sure the lid closes completely and that the switch properly engages when the lid is down. If the switch appears to be in good condition but the error persists, it may be necessary to replace the switch or examine the wiring for any faults.
Common Causes of the Error Code
Identifying Potential Issues with GE Washer Error Code E31
Cause 1
If your GE washer is showing the error code E31, it typically points to an issue with the water level sensor. One frequent culprit behind this problem is a malfunctioning lid switch. This component is crucial because it informs the washer when it’s safe to fill with water. If the lid switch is defective, the washer may fail to recognize that the lid is closed, resulting in the E31 error.
Another possible cause could be related to the electrical connectors. Loose or corroded connections can interfere with the communication between the water level sensor and the control board. To address this issue, I recommend carefully inspecting both the lid switch and the electrical connections. Look for any visible signs of damage or disconnection, as these can often be the root of the problem.
Taking these steps will not only help you diagnose the issue but also empower you to resolve the E31 error effectively and safely. Always remember to unplug your washer before attempting any repairs to ensure your safety.
Cause 2
While a malfunctioning lid switch is a common cause of the E31 error code, there are several other factors worth considering. Understanding these elements can significantly aid in effective washer maintenance and troubleshooting.
- Wiring Issues: Check for any damaged or loose wires connected to the lid switch. These can disrupt its operation and lead to errors. If you notice any frayed wires, they should be repaired or replaced immediately to ensure proper functionality and safety.
- Control Board Malfunction: The control board acts as the brain of your washer. If it’s faulty, it may not interpret the lid switch’s status correctly, which can trigger the E31 error. In some cases, a reset of the control board can resolve the issue, but persistent problems may require a professional evaluation and potential replacement.
- Mechanical Obstructions: Sometimes, foreign objects or debris can block the lid mechanism, preventing it from fully engaging. Inspect the area around the lid and remove any items that may hinder its operation. Regular cleaning can help prevent this issue from arising.
Cause 3
When troubleshooting the E31 error code, there are several important considerations to keep in mind. One prevalent cause of this error is inadequate washer maintenance. Over time, lint and debris can build up around the lid switch, which can hinder its performance. To prevent this issue, it’s crucial to regularly clean the interior of your washer and ensure that the area around the lid switch remains clear.
Additionally, inspect the lid switch itself for any signs of wear or damage. If you notice any abnormalities, it may be time to replace the lid switch to restore proper functionality.
Another critical factor to investigate is whether your washer is level. An unbalanced machine can inadvertently trigger the E31 code, so make sure that your washer is sitting evenly on the floor.
Cause 4
One common cause of the E31 error code in washers relates to electrical issues, particularly concerning the wiring linked to the lid switch. If there’s a problem with the electrical connection, it can prevent the lid switch from signaling to the washer that it’s safe to operate. Here’s a step-by-step guide to troubleshoot this issue effectively:
- Inspect the Wiring: Begin by visually examining the wires that lead to the lid switch. Look for any signs of damage, such as fraying or exposed sections. If you notice any wear, it may be necessary to replace the affected wiring.
- Test the Lid Switch: Use a multimeter to test the lid switch’s functionality. Set your multimeter to the continuity setting and check for proper contact when the lid is closed. If there’s no continuity, the lid switch may need to be replaced.
- Examine Connections: Make sure that all connections are secure and free from corrosion. Loose or corroded connections can impede the electrical flow, leading to the E31 error code. If you find any corrosion, cleaning the connections or replacing them might be necessary.
Required Tools to Fix the Error
Preparing for Repair: Essential Tools and Supplies
Basic Tools
Having the right tools is crucial for effectively addressing the GE washer error code E31, which often indicates a lid switch failure. As someone with over 20 years of experience in appliance repair, I can assure you that having the right equipment at hand will streamline your troubleshooting process and empower you to resolve the issue safely and efficiently. Here are three essential tools you’ll need for the task:
- Screwdriver Set – A comprehensive screwdriver set, including both flathead and Phillips head screwdrivers, will allow you to easily remove and replace the lid switch, as well as access various internal components of the washer.
- Multimeter – This invaluable tool is essential for testing the continuity of the lid switch. By using a multimeter, you can determine whether the switch is functioning properly or if it needs to be replaced, ensuring you make informed decisions during your repair.
- Pliers – Needle-nose pliers are particularly useful for grasping and manipulating small parts within the washer. They give you the precision needed to work in tight spaces, helping you avoid any unnecessary damage to other components.
With these basic yet essential tools at your disposal, you’ll be well-prepared to identify and resolve the E31 error code. Remember, safety is paramount, so always ensure the washer is unplugged before beginning any repair work. Feel free to reach out if you have any questions or need further guidance!
Supplies
With the right tools already in hand, it’s time to gather the specific supplies necessary for effectively addressing the E31 error code in your GE washer. By ensuring proper maintenance, you can help your washer perform reliably for years to come. Here’s a concise list of the essential supplies you’ll need:
| Supply | Purpose |
|---|---|
| Replacement Lid Switch | Resolves the E31 error by restoring functionality |
| Screwdriver | Facilitates the removal of the washer panel |
| Multimeter | Tests electrical connections for faults |
| Towel | Absorbs any water during the repair process |
| Cleaning Solution | Cleans components, preventing potential drain issues |
Having these supplies on hand will not only streamline your repair process but also empower you to effectively tackle the E31 error. Remember, taking these steps can help ensure the longevity and efficiency of your washer.
Pre-Safety Checklist Before Fixing
Before you begin repairing a GE washer that’s showing the E31 error code, it’s essential to prioritize your safety by completing a pre-safety checklist. Adhering to these precautions will help ensure a secure working environment:
Before repairing a GE washer displaying the E31 error code, ensure safety by following a pre-safety checklist.
- Unplug the Washer: Always disconnect the power supply. This step is crucial for preventing electrical hazards while you’re working on the machine.
- Check for Water: Make sure the washer is fully drained. Look around the appliance for any standing water to reduce the risk of slips or electrical issues.
- Wear Protective Gear: Equip yourself with gloves and safety goggles. This protective equipment is vital for shielding against sharp edges and potential hazards from electrical components during the repair process.
Diagnose the Error Code
To effectively diagnose the E31 error code on your GE washer, let’s approach this step by step. This error often relates to issues with the door latch, so it’s essential to start there. First, ensure that the door latch is clean and free of any debris that might prevent it from functioning properly. If you notice any damage to the latch, it may need to be replaced to resolve the issue.
Next, it’s crucial to inspect the wiring connections associated with the door latch. Look for any signs of wear, fraying, or disconnection that could affect the latch’s performance.
Here’s a straightforward reference table to guide you through the troubleshooting process:
| Step | Action |
|---|---|
| 1. Check Door Latch | Ensure it clicks securely into place when closed. |
| 2. Inspect Wiring | Look for any frayed or disconnected wires. |
| 3. Test Lid Switch | Use a multimeter to check for continuity in the switch. |
| 4. Replace Parts | If you find any faulty components, swap them out as necessary. |
Step-by-Step DIY Troubleshooting Guide
Systematic Approach to Resolving Error Code E31
Fix for Cause 1
If you’re facing the GE washer error code E31, it’s important to approach the problem with a clear understanding of its possible causes. One frequent issue is a malfunctioning lid switch or its associated wiring harness. Here’s a step-by-step guide to help you troubleshoot this issue safely and effectively:
- Inspect the Lid Switch: Start by opening and closing the washer lid to ensure that the lid switch is engaging correctly. Listen for a distinct click sound; if you don’t hear it, the switch may be faulty and could require replacement.
- Examine the Wiring Harness: Take a moment to check the wiring harness that connects to the lid switch. Look for any signs of visible damage, such as frayed wires, loose connections, or corrosion that might affect the switch’s operation.
- Test the Switch: To confirm whether the lid switch is functioning properly, you’ll need to use a multimeter. Set the multimeter to measure continuity and test the switch while it is closed. If the multimeter indicates no continuity when the switch is engaged, it’s time to replace the switch.
Fix for Cause 2
When dealing with the GE washer error code E31, it’s essential to consider the possibility of a malfunctioning control board. Here’s a step-by-step guide to help you troubleshoot this issue effectively and safely:
- Disconnect Power: Always start by unplugging the washer. This step is crucial for your safety while working on the appliance.
- Inspect Wiring Harness: Examine the wiring harness that connects to the control board. Look for any signs of damage or loose connections, as these can cause erratic behavior in the washer.
- Test Lid Switch: Using a multimeter, check the lid switch for continuity. A faulty lid switch can disrupt the washing cycle and trigger error codes. If you find that it’s not functioning correctly, replacing it is a straightforward solution.
Here’s a quick reference for your troubleshooting:
| Step | Action | Purpose |
|---|---|---|
| 1 | Disconnect Power | Ensures your safety |
| 2 | Inspect Wiring Harness | Identifies potential issues |
| 3 | Test Lid Switch | Confirms proper functionality |
Fix for Cause 3
To effectively resolve the GE washer error code E31, it’s important to carefully examine the pressure switch, as any malfunction can result in inaccurate water level readings. This investigation is crucial for accurately diagnosing a potential lid switch failure. Here’s a straightforward guide to help you troubleshoot this issue:
- Locate the Pressure Switch: The pressure switch is typically situated near the control panel of your washer. Familiarize yourself with its location to facilitate your inspection.
- Inspect the Hose: The hose connected to the pressure switch can sometimes become blocked or kinked, impacting its performance. Carefully check for any obstructions or bends in the hose. If you find any issues, clean the hose or replace it as needed to ensure proper airflow.
- Test the Switch: Using a multimeter, you can test the pressure switch for continuity. This step is essential as it confirms whether the switch is functioning correctly. If the multimeter indicates a defect, replacing the pressure switch is necessary for restoring your washer’s proper operation.
Fix for Cause 4
After addressing the pressure switch issues, the next step in resolving the GE washer error code E31 is to examine the lid switch. First and foremost, ensure your safety by unplugging the washer before you begin any diagnostic work.
Locate the lid switch, which is typically positioned near the lid hinge. Take a close look for any signs of visible damage or wear, as this can often lead to malfunctioning. To test the lid switch, you’ll need a multimeter. Set it to the continuity setting and carefully place the probes on the terminals of the switch. When the lid is closed, the multimeter should register continuity. If it doesn’t, it indicates that the lid switch is likely faulty and will need to be replaced.
Once you have the new switch, install it carefully, ensuring all connections are secure. After reinstalling, plug the washer back in and run a test cycle to verify that the error code E31 has been resolved. Remember, always prioritize safety and double-check your work to ensure your washer operates reliably.
Call a Professional If
If you’ve attempted to troubleshoot the GE washer error code E31 without success, it may be time to call in a professional technician. Tackling repairs outside of your skill set can not only pose safety risks but might also cause further damage to your washer. A qualified technician can accurately diagnose and resolve the issue effectively.
Here are a few signs that indicate you should seek professional assistance:
- Lid Switch Assembly or Wiring Concerns: If you’re unsure about the condition of the lid switch assembly or the associated wiring, it’s best to let an expert handle it. These components are crucial for the safe operation of your washer.
- Unusual Sounds or Smells: If you notice any strange noises or odors while your washer is running, don’t ignore them. These could be indicators of serious issues that require professional evaluation.
- Persistent Error Code: If the E31 error code continues to appear despite your troubleshooting efforts, this suggests a deeper issue that may not be easily resolved without specialized knowledge and tools.